matlab-with-python-book
3. Set-up MATLAB and Python
3.1. Install Python
You can simply go to www.python.org/downloads and select a version of Python compatible with your MATLAB version
For instance, this is the list of versions compatible with the latest releases:
| MATLAB Version | Compatible Versions of Python 3 |
|---|---|
| R2024b | 3.10, 3.11, 3.12 |
| R2024a | 3.9, 3.10, 3.11 |
| R2023b | 3.9, 3.10, 3.11 |
| R2023a | 3.8, 3.9, 3.10 |
| R2022b | 2.7, 3.8, 3.9, 3.10 |
| R2022a | 2.7, 3.8, 3.9 |
| R2021b | 2.7, 3.7, 3.8, 3.9 |
3.1.1. Install Python on Windows
If you are running on Windows, download the Windows installer (64-bit): the file python-3.10.10-amd64.exe is only 28Mo. Just run this executable (you can uncheck the admin privileges):

By default, the checkbox “Add python.exe to PATH” isn’t checked. I would advise you to select it (Otherwise, you will have to add Python to your PATH manually):

Select -> Install Now:

It should only take about a minute to get everything installed on your machine.
The following applications have been installed and are accessible from your Start menu:

To check that you have Python installed and available to your PATH, open a command prompt:
C:\Users\ydebray>where python
C:\Users\ydebray\AppData\Local\Programs\Python\Python310\python.exe
C:\Users\ydebray\AppData\Local\Microsoft\WindowsApps\python.exe
If you have several versions of Python installed, it will return each of them, in the order listed in your PATH, plus the last one that isn’t actually installed:
C:\Users\ydebray\AppData\Local\Microsoft\WindowsApps\python.exe
This is a link to a version packaged on the Microsoft Store. If you run it, you’ll be redirect to the Store:

3.2. Install Anaconda or other Python distribution
With the previous version installed, you only have the base Python language. No numerical packages, or Development Environment (unlike MATLAB that ships all of those features by default). To get a set of curated data science packages pre-installed, you can download a distribution, like Anaconda:
Be aware of the fact that you now need to comply with [Anaconda’s terms of services](https://www.anaconda.com/terms-of-service) (since September 2020): You can only use the open-source [Anaconda Distribution](https://www.anaconda.com/products/individual) professionally for free if you are not part of an organization with more than 200 employees. Otherwise, you will need to buy a license of [Anaconda Professional](https://www.anaconda.com/products/professional).
If you are searching for an alternative distribution to Anaconda, I would recommend WinPython on Windows. If you are running on Linux, I believe you don’t need a distribution and can manage packages yourself.
3.2.1. Install Miniconda from conda-forge
Conda-forge provides installers of the conda package manager that point by default to the community channel, to remain in compliance with the terms of use of the Anaconda repo, even for “commercial activities”.
Download and run the installer of miniforge (55 MB):

3.2.2. Install Micromamba for minimal footprint
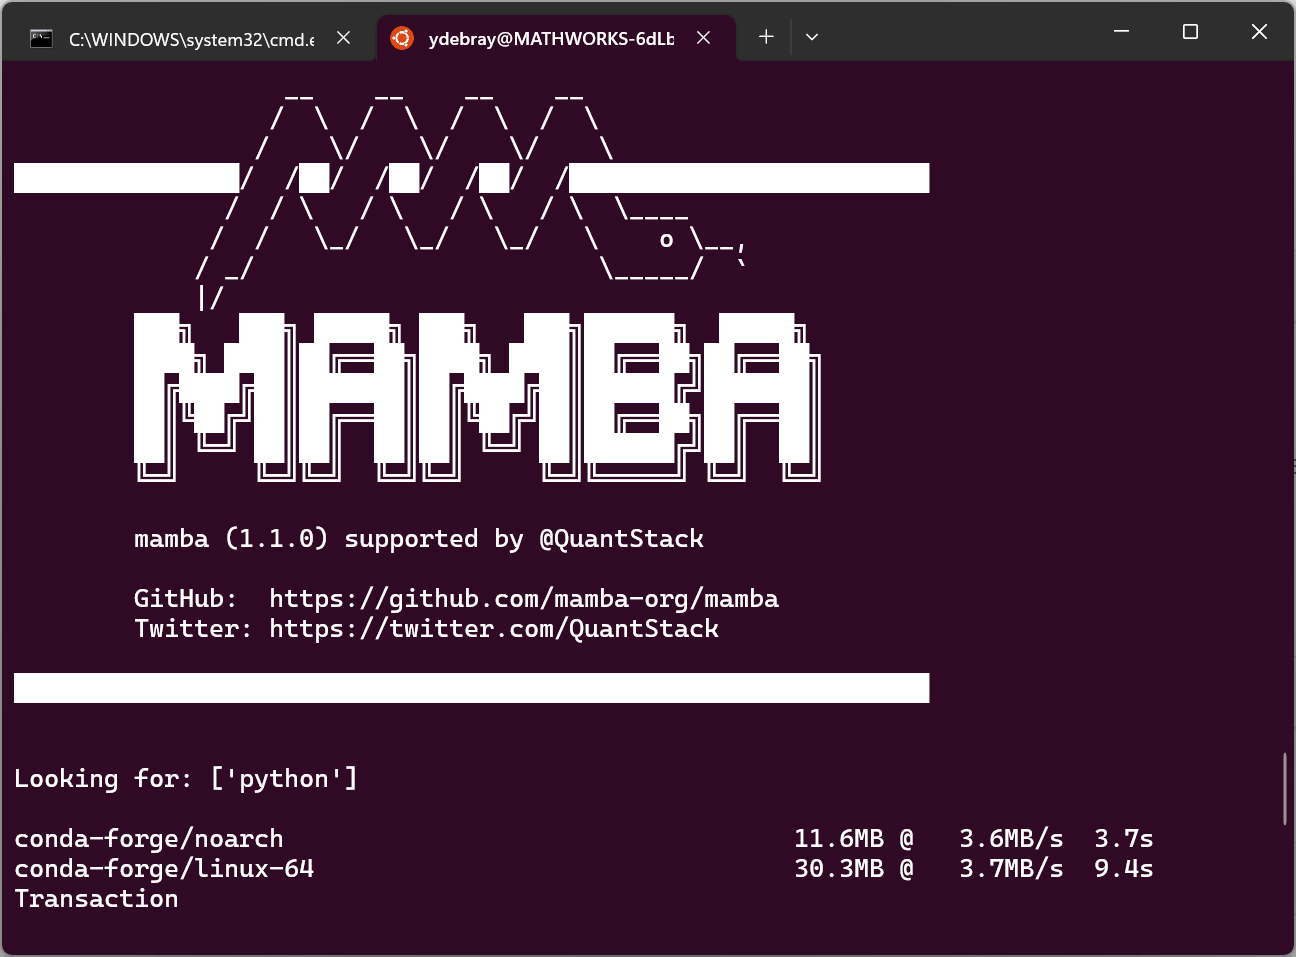
micromamba is a 4 MB pure-C++ drop-in replacement for the conda package manager. Unlike pip or conda, it is not written in Python, so you don’t need to get Python to get it, and it can retrieve python:
On Linux:
curl micro.mamba.pm/install.sh | bash
(base) $ mamba install python

3.3. Manage your PATH
When you have several versions of Python installed, the command python returns the version that is higher up in your PATH. To check which version of Python is used by default:
C:\Users\ydebray>python --version
Python 3.10.10
To change this, you will need to modify your PATH

You can edit your PATH in environment variables, by tipping “path” in the search bar of your Windows start menu. Select the Path in the user variables (it will be written on top of the system variables):


You can modify the order in which each version of Python is listed in
the PATH. And in order to access pip (the Python default package
manager), make sure to also list the Script folder in the PATH:
C:\Users\ydebray\AppData\Local\Programs\Python\Python310\Scripts

3.4. Install additional Python packages
In order to retrieve additional packages from the Python Package Index, use the pip command:
C:\Users\ydebray>pip install pandas
This will for instance install the famous pandas package. It will also automatically retrieve its dependencies (in this case numpy, python-dateutil, pytz).
You can check if a package is installed by calling the method pip show. It will show information about this package:
C:\Users\ydebray>pip show pandas
Name: pandas
Version: 1.3.3
Summary: Powerful data structures for data analysis, time series, and
statistics
Home-page: https://pandas.pydata.org
Author: The Pandas Development Team
Author-email: pandas-dev@python.org
License: BSD-3-Clause
Location:
c:\users\ydebray\appdata\local\programs\python\python39\lib\site-packages
Requires: numpy, python-dateutil, pytz
Required-by: streamlit, altair
To upgrade a package previously installed with a new version:
C:\Users\ydebray>pip install --upgrade pandas
3.5. Set up a Python virtual environment
If you have different projects leveraging different versions of the same
package, or if you want a way to replicate your production environment
in a clean space, use Python virtual environment. It’s a type of
virtualization at the language level (like Virtual Machine at the
Machine level, or Docker container at the Operating System level). This
is the default way (shipped with base Python) to create a virtual
environment called env:
C:\Users\ydebray>python -m venv env
You then need to activate it
- On Windows:
C:\Users\ydebray>.\env\Scripts\activate - On Linux:
$ source env/bin/activateOnce you’ve done that you can install the libraries you want, for instance from a list of requirements:
C:\Users\ydebray>pip install -r requirements.txt3.6. Set up a Python Development Environment
Once you’ve installed Python and the relevant packages for scientific computing, you still don’t quite have the same experience as with the MATLAB Integrated Development Environment (IDE).
Two key open-source technologies are taking a stab at reshaping the tech computing landscape:
- Jupyter Notebooks
- Visual Studio Code
They are redefining the way Languages and Development environments are interacting. Based on open standards for interactive computing first with Jupyter. Adding richer interaction for multiple languages in the IDE, with the VS Code Language Server Protocol.
3.6.1. Jupyter Notebooks

Jupyter Notebooks have become over the years, one of the most used and appreciated data science tools. They combine text (as Markdown), code, and output (numerical and graphical). Notebooks help data scientist to communicate goals, methods and results. It can be seen as an executable form of textbook or scientific paper.
Jupyter stands for Julia, Python and R, but it is also an homage to Galileo’s notebooks recording the discovery of the moons of Jupiter. Those notebooks were probably one of the first instance of open science, data-and-narrative papers. When Galileo published the Sidereal Messenger in 1610 (one of the first scientific paper), he actually published his observations with code and data. It was a log of the dates and the states of the night. There was data and metadata, and there was a narrative.

Jupyter is a project that spun off in 2014 from IPython. IPython stands for Interactive Python and was created in 2001 by Fernando Perez. He drew his inspiration from Maple and Mathematica that both had notebook environments. He really liked the Python language, but he felt limited by the interactive prompt to do scientific computing. So he wrote a python startup file to provide the ability to hold state and capture previous results for reuse, and adding some nice features like loading the Numeric library and Gnuplot. ‘ipython-0.0.1’ was born, a mere 259 lines to be loaded as $PYTHONSTARTUP.
Around 2006, the IPython project took some inspiration from another
open-source project called Sage. The Sage Notebook was taking the
route of using the filesystem for notebook operations. You couldn’t
meaningfully list files with ls or move around the filesystem by
changing directory with cd. Sage would execute your code in hidden
directories with each cell actually being a separate subdirectory.
In 2010, the architecture of IPython evolved by separating the notebook
front-end from the kernel executing Python code, and communicating
between the two with the ZeroMQ protocol. This design enabled the
development of a Qt client, a Visual Studio extension, and finally a web
frontend.


IPython gave turn to Jupyter, to become language agnostic. Jupyter supports execution environments (aka kernels) in several dozen languages among which are Julia, R, Haskell, Ruby, and of course Python (via the IPython kernel)… and MATLAB (via a kernel maintained by MathWorks).
To summarize, Jupyter provides 3 key components to the modern scientific computing stack:


Some of the testimonies of the pervasive success of Jupyter in data science are the development of additional capabilities from the ecosystem:
- Running Notebooks on Google Colab
- Render Notebooks on GitHub
Read more on Jupyter:
-
The scientific paper is obsolete, by James Somers – The Atlantic – APRIL 5, 2018
https://www.theatlantic.com/science/archive/2018/04/the-scientific-paper-is-obsolete/556676/ -
The IPython notebook: a historical retrospective
http://blog.fperez.org/2012/01/ipython-notebook-historical.html -
A Brief History of Jupyter Notebooks
https://ep2020.europython.eu/media/conference/slides/7UBMYed-a-brief-history-of-jupyter-notebooks.pdf -
The First Notebook War - Martin Skarzynski https://www.youtube.com/watch?v=QR7gR3njNWw
3.6.2. MATLAB Integration for Jupyter
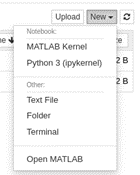
MathWorks has released an official kernel for Jupyter in January 2023. In addition to this, you also have a way to integrate the MATLAB full environment as an app inside of a JupyterHub server installation. You can find this app easier in the ‘New’ menu, or if you are using JupyterLab, as an icon in the launcher:


To find out how to install this on your JupyterHub server:
- https://github.com/mathworks/jupyter-matlab-proxy
- https://www.mathworks.com/products/reference-architectures/jupyter.html
3.6.3. Visual Studio Code
I adopted VS Code when I discovered that it was supporting Jupyter/IPython Notebook ipynb files.
As any other Integrated Development Environment, VS Code supports writing scripts and executing them in several languages (Python, Javascript, …)
As of early 2024, VSCode also has a MATLAB extension that enables you to run MATLAB code in the editor by connecting to a MATLAB session running on your machine.

The big difference with the Eclipse approach to componentization is the web standards adopted, called Language Server Protocol:
This enables to have richer interactions between the development tool and the language server. And since it is all based on web technologies, you can access a web version at vscode.dev. Unlike for web languages like HTML/JS, this does not enable the execution of Python as it would require an interpreter running in the browser, or a server to connect to. Some hacks exist based on Pyodide (a port of Python to WebAssembly).
3.7. Connect MATLAB to Python
You can connect your MATLAB session to Python using the pyenv command since 2019b. Before that, use pyversion (introduced in 2014b).
If you have multiple Python versions installed, you can specify which version to use, either with:
>> pyenv('Version','3.10')
or
>> pyenv('Version','C:\Users\ydebray\AppData\Local\Programs\Python\
Python310\python.exe')
This is also the way to connect to Python virtual environments:
>> pyenv('Version','env/Scripts/python.exe)
In your project folder, where you created your virtual environment called env, you simply need to point to the Python executable that is contained in the Scripts subfolder.
Execution Mode:
By default, Python runs in the same process as MATLAB. On the plus side, it means that you don’t have overhead for inter-process data exchange between the two systems. But it also means that if Python encounters an error and crashes, then MATLAB crashes as well. This can happen when MATLAB uses different versions of the same library than a given package. For this reason, the Out-of-Process execution mode has been introduced :
>> pyenv("ExecutionMode","OutOfProcess")
Setup Tips:
- Ensure all code is on path (both on the MATLAB and Python side)
- Check environment settings, depending on how you set up Python
- In Out-of-Process Execution, you can terminate the Python process
3.8. Install the MATLAB Engine API for Python
Since the MATLAB Engine for Python has been added to the Python Package Index (mid-April 2022), you can simply install it with the pip command:
C:\Users\ydebray>pip install matlabengine
Before that and for release prior to MATLAB R2022a, you had to install in manually:
cd "matlabroot\extern\engines\python"
python setup.py install
On Linux, you need to make sure that the default install location of MATLAB by calling matlabroot in a MATLAB Command Window. By default, Linux installs MATLAB at:
/usr/local/MATLAB/R2024b